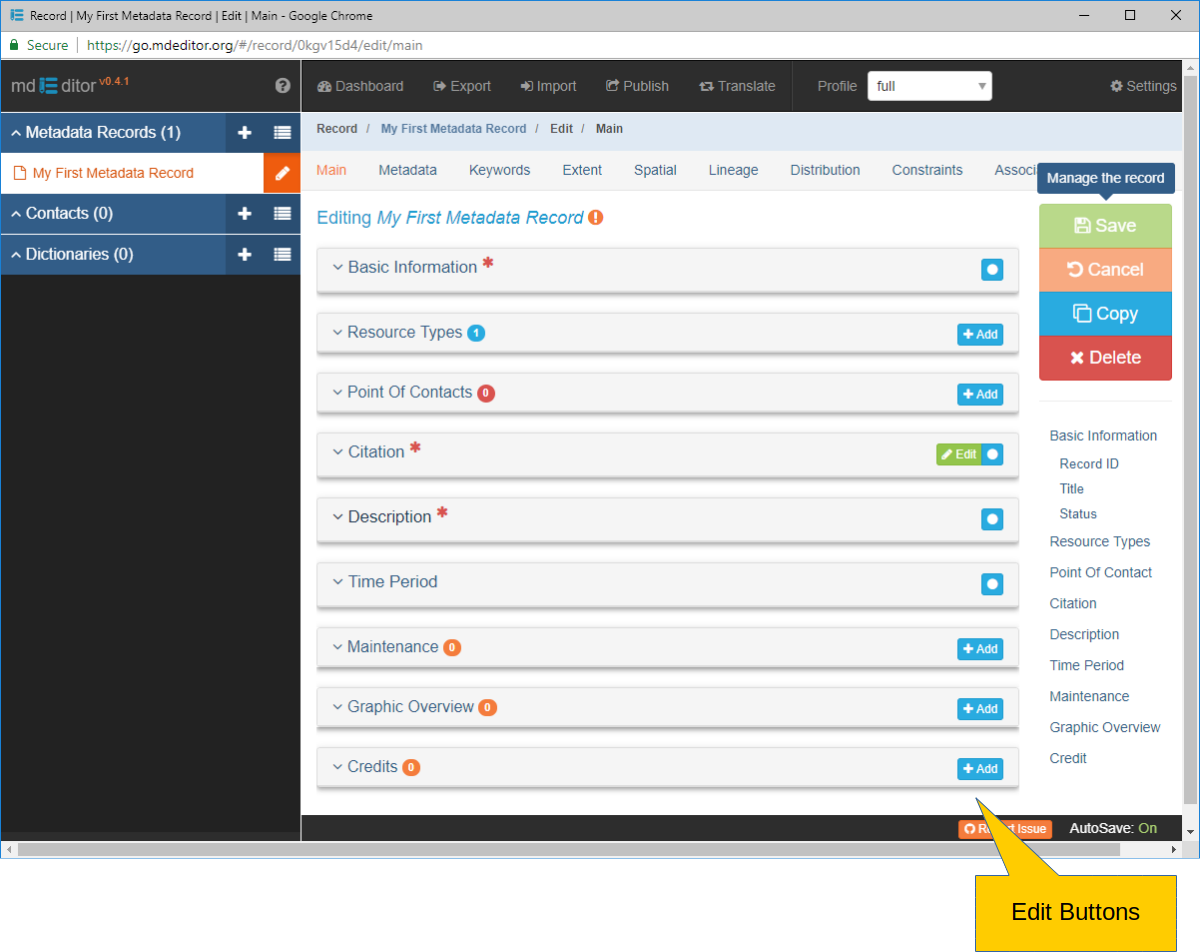
Tutorial -- Edit Window Buttons
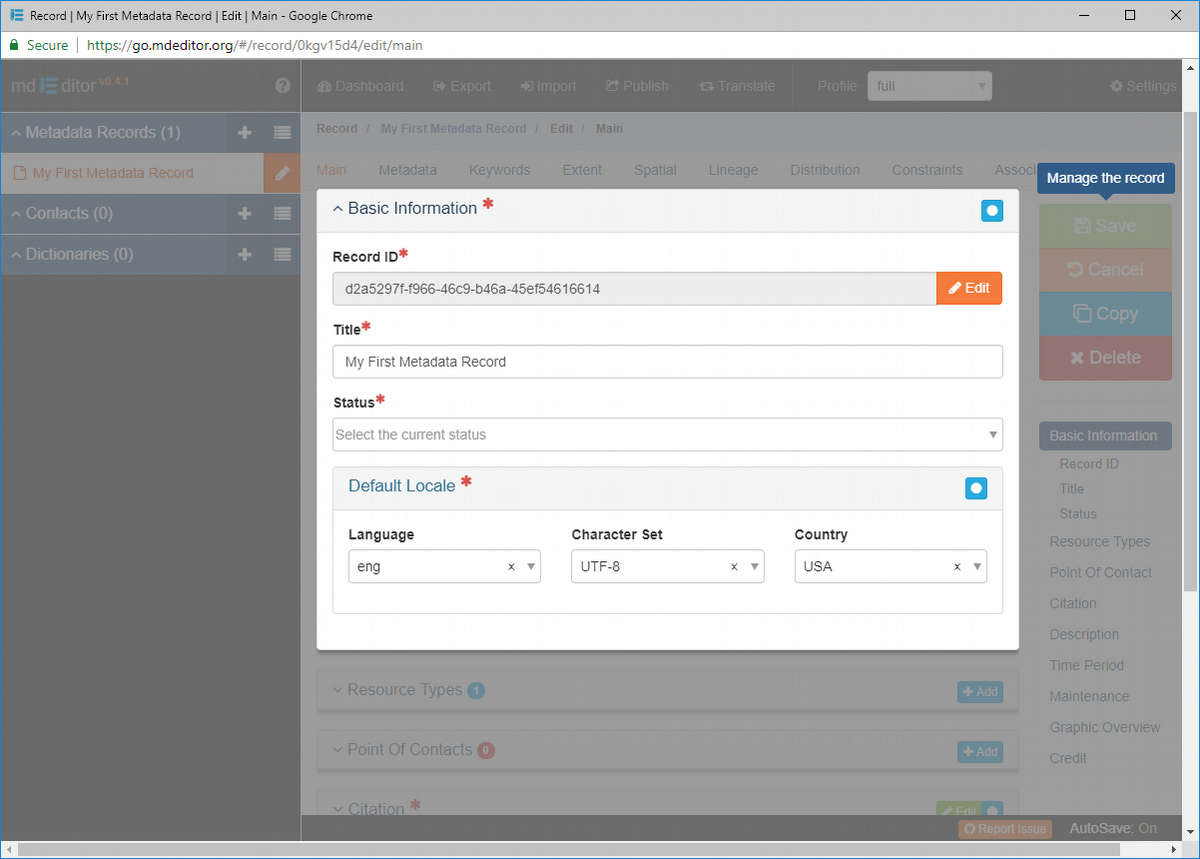
 Isolate Panel
Some panels, and even sub-panels (panels within panels), have an 'Isolate' button. Clicking this will visually isolate the panel and all its elements from the surrounding data by dimming information not in scope, making it easier to focus on relevant content. When you are ready to return a normal view of the Edit Window, click on the 'Isolate' button once again, or click simply click anywhere off the isolated panel. In the example below the Basic Information panel has been isolated. Notice also that Default Locale is a sub-panel that can be further isolated should you choose.
Add Add New Object
Clicking the 'Add' button on a Panel Title Bar will add a new object to the panel. The new object can then be edited as needed.
Edit Edit Object
An 'Edit' button will appear on Panel Title Bars of panel objects when the object contains more elements than can be presented in the current window without creating clutter.
Clicking the 'Edit' button will navigate you to a new window where the object can be edited on its own. After making your edits, click the OK button to bring you back to where you initiated the edit. The 'OK' button may appear at the top, bottom, or both of the object edit window. As an example of how this works, let's look at the Citation.
Edit the Citation
- On the Citation Panel Title Bar click Edit. You should see the Citation Edit Window pictured below.
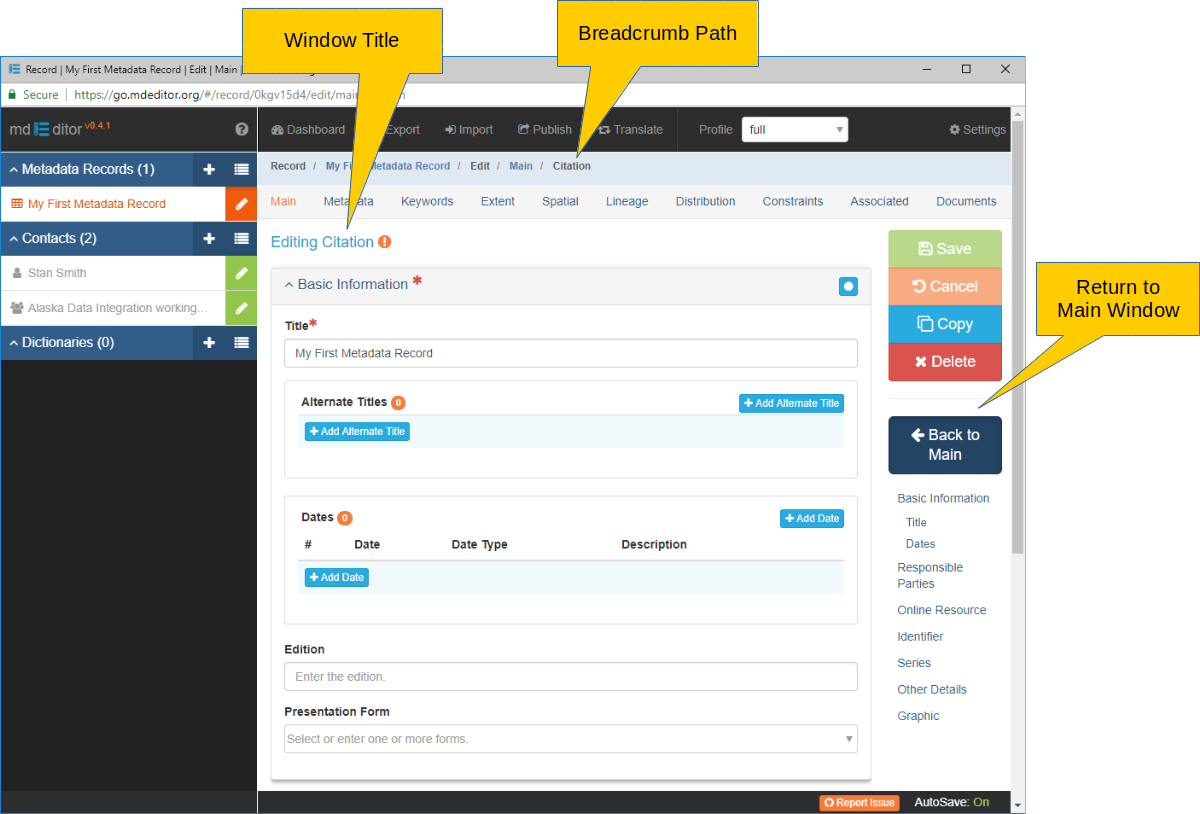
There are a few things to notice on the above window.
- The Edit Window Title has changed to indicate you are now editing a citation object.
- The Fast Scrolling buttons have changed to reflect the panels of the Citation Edit Window rather than the Main section.
- There is a new button in Record Management area of the Secondary Sidebar, Back to Main.
Click the Back to Main button now to return to the Edit Window Main section.
Above we discussed that clicking the Add button will add another object to a panel. Below is an example of an array-type panel with a second object added. To manage the objects independently, several buttons are added to each object.
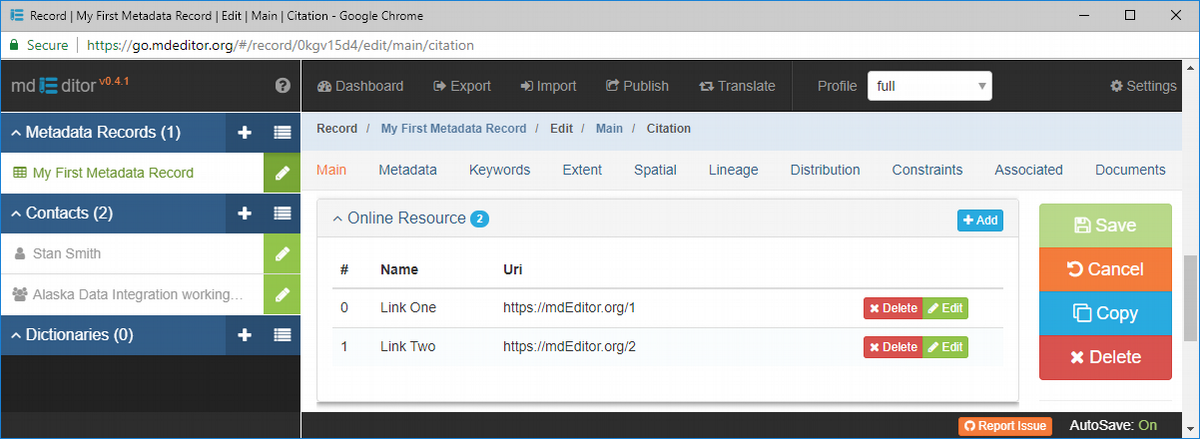
Edit Edit Array Object
When an 'Edit' button appears next to a panel object, clicking it will expand the object for editing. After editing, click the OK button to hide the object's detail and restore the Edit Window.
Delete Delete Array Object
The 'Delete' button adjacent to an object is used to remove the object from the array. After clicking 'Delete' the button will change to Confirm. Clicking 'Confirm' will complete the delete operation.
Okay! That's probably enough orientation to the Edit Window's sections, buttons, and icons. Time to get some actual work done. So let's return to filling in our minimal metadata record.