Metadata Record -- Extent Section
Edit Geographic Features
All geographic Features can edited on the map whether they were initially drawn or imported, the editing process is the same.
Locate a Feature
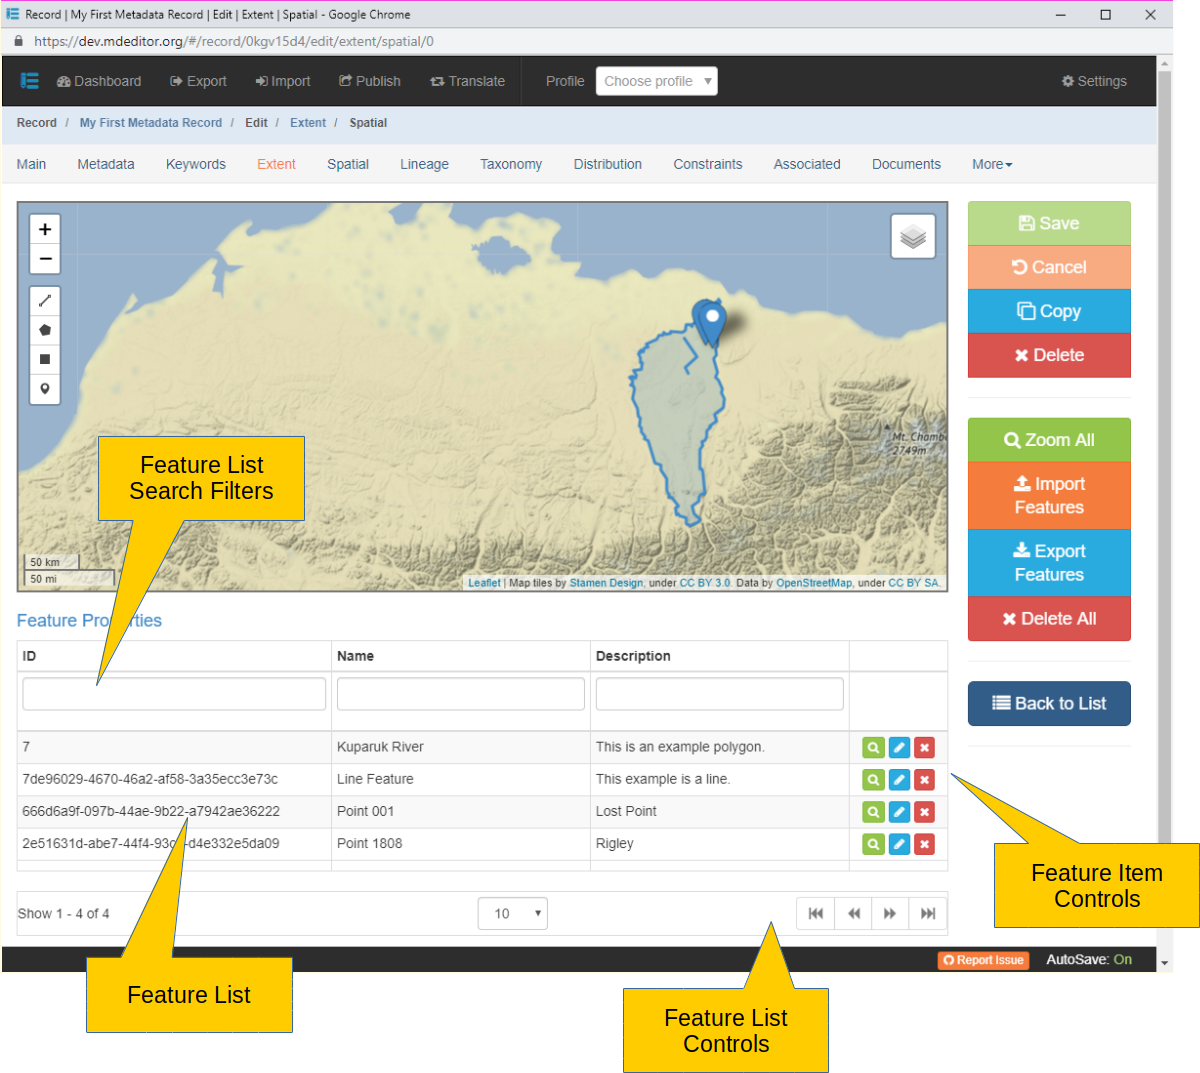
The first step in editing a Feature is to locate the feature. This can be done directly on the map or using the Feature List near the bottom of the window.
Select from Feature List
As the mouse rolls over lines on the Feature List the corresponding Feature is highlighted on the map.
If the Feature isn't in the current map display area, click the button to center the map on the feature. The map will also zoom to best show the feature.
When centering in on points, the map zooms to a scale of 300 meters. However, map tiles only display to a maximum resolution of 500 meters. Therefore the map detail is lost and a gray background replaces the map. To regain map detail simply zoom out a level to 500 meters or greater.
Click to enter edit mode on the Feature.
Click to delete the Feature.
There is no confirmation option before delete!
The default Feature List shows the first 10 Features. When more than 10 features have been added to the map use the 'Feature List' controls at the bottom of the window to page the list up or down to see all the features. You may also change the number of features shown in the list at one time.
To narrow the list of features displayed use the 'Search Filter' option at the top of the 'Feature List'. The list may be filtered by ID, Name, and Description. Type your search string into one or more of the filter boxes and the 'Feature List' will show only those Features that match. Clear the filters to see the full list again.
Select from Map
To select a Feature on the map for editing double click the feature. For polygons this can be anywhere inside the polygon.
Double clicking to select a line can be tricky, especially if the line falls within a polygon, the polygon always seems to get priority. When having trouble selecting any feature directly from the map try selecting from the Feature List instead.
Edit Shape
Points
Points can be moved or deleted. When a point is selected for edit it's map symbol will change color and be surrounded by a dashed line. The 'Edit / Delete' buttons for shape edits will show on the left edge of the map if not already present.
Click and drag the point to it's new location then click the 'Save' button on the pop-out menu of the edit button ( ), or click 'Cancel' to return the point to it's initial location.
To delete the point Feature, select the point for edit then click the  button. On the pop-out menu that appears click "Clear All" to delete the Feature. Both the "Save" and "Cancel" buttons will cancel the delete process.
The actual coordinate values for the point cannot be edited within mdEditor.
Lines and Polygons
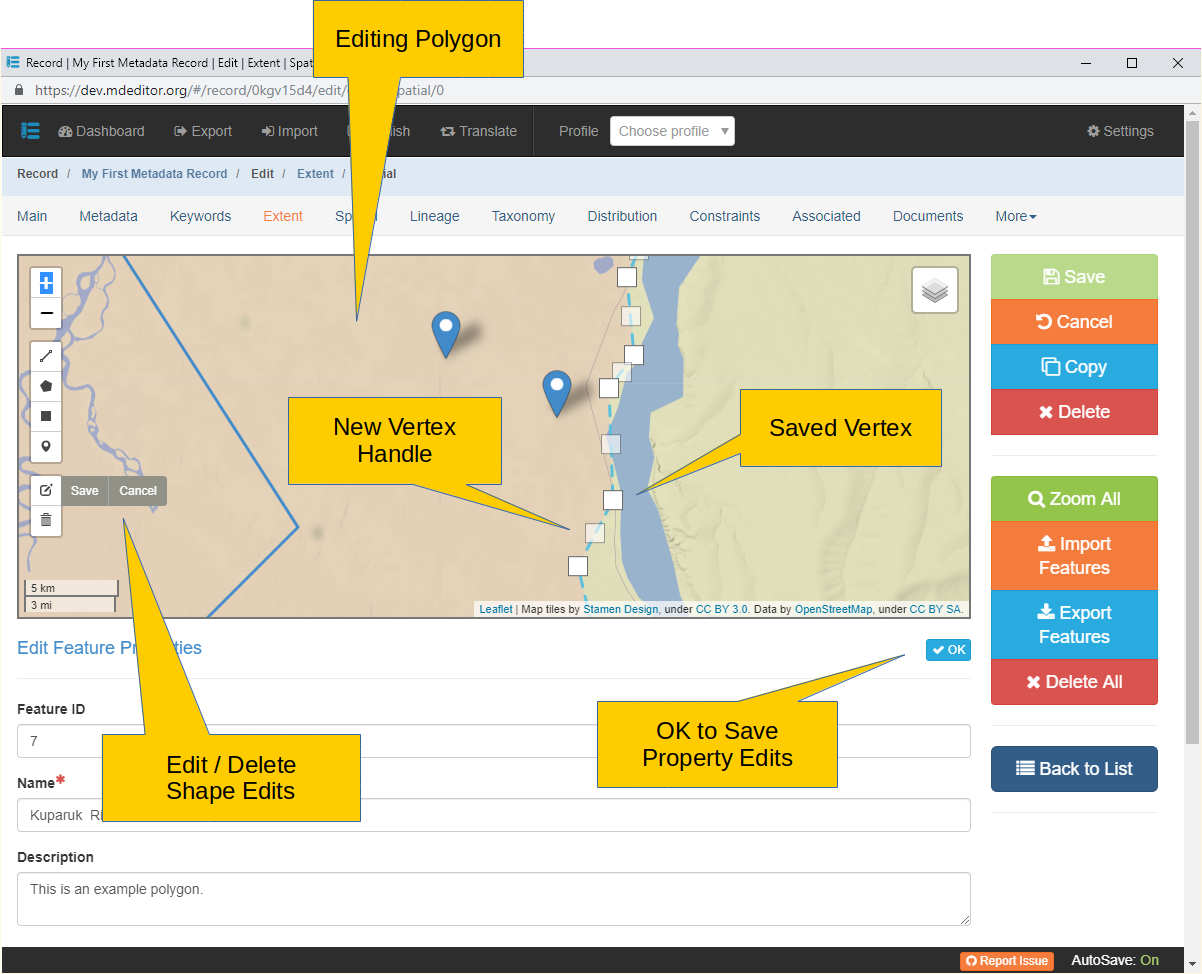
Lines and polygons can be reshaped or deleted, but not moved as a complete map feature. When the line or polygon is selected for edit it's line becomes dashed and each vertices is marked by an opaque white square (see above image). These mark the 'saved vertices' or vertices that represent an actual point in data. Mid way between saved vertices is transparent square providing a handle for adding a new vertex to the data file.
To move an existing point (vertex) click and drag any opaque square to it's new location. To increase the detail of the line or polygon you can click and drag one of the transparent squares to a desired location. This will add a new vertex to the data. Notice that the new vertex turns opaque and transparent squares appear on either side of the new vertex.
To delete an existing point (vertex) click the vertex without moving the mouse.
Clicking on a transparent square will add a new vertex to the data file even if the square is not dragged to a new location. In this way a portion of line segment can be pinned before moving one it's original end point.
After reshaping a line or polugon click the 'Save' button on the pop-out menu of the edit button (), or click 'Cancel' to return the vertices to their original positions.
To delete the line or polygon Feature, select the feature for edit then click the button. On the pop-out menu that appears click "Clear All" to delete the Feature. Both the "Save" and "Cancel" buttons will cancel the delete process.
Edit Properties
To edit the properties of a Feature click the button on the corresponding line in the Feature List or double click the feature on the map. The Feature's properties will be shown in a table below the map that temporarily replaces the Feature List.
Only the ID, Name, and Description elements may be edited. All other properties of the Feature are displayed as read-only.
Click the OK button to save your changes and show the Feature List once again.
Initiate property edits using the button when possible. After clicking the OK button to end property edits the Feature will remain in active edit mode on the map. You will need to click 'Save' or 'Cancel' on the button pop-out menu to close shape edit mode.